Creating Terrain from Heightmaps - Unity Game Development Tutorial
In this Unity game development tutorial we're going to look at how we can create realistic looking terrain from real world height data.
You can either watch the video version below or continue reading for written instructions.
You can hand sculpt terrain using the tools in Unity, but in this tutorial we're going to look at an alternative - using images known as heightmaps.
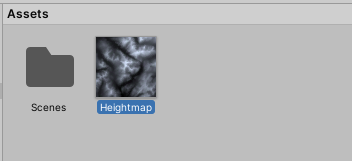
A heightmap is a grayscale image that contains height information. The darker pixels represent areas of low height and the lighter pixels represent higher areas. Below is an example of a heightmap.
There are various sources online that you can get free heightmaps, but we're going to look at this one that allows you to create heightmaps of the real world - https://cs.heightmap.skydark.pl/
This resource was created for generating terrain for the game Cities Skylines but it will work just as well in Unity.
Basically, it allows us to select any 18km square area on the map and then create a heightmap for that area.
We'll select this mountainous area in the UK.
Then we'll click the button to download the PNG and save it to the Assets folder of our project.
Back in Unity we can see the generated grayscale heightmap.
To create terrain from this image we need to add the Terrain Tools package.To do this we'll go to Window->Package Manager.
The Terrain Tools are still in preview so we'll need to click on the cog and open the 'Advanced Project Settings'. We’ll click to enable preview packages.
We'll select the Unity Registry as the source and search for Terrain Tools. Then we'll install the package.
To create the Terrain we'll got to Window->'Terrain Toolbox'. We'll then check the 'Import Heightmap' checkbox and select the heightmap.
Then we need to adjust the settings to match the size of the heightmap. The area was 9 kilometres by 9 kilometres so we'll set the width and height to 9000 metres. The maximum height of the area was 1061 so we'll set the height to this.
Then we'll just click on create.
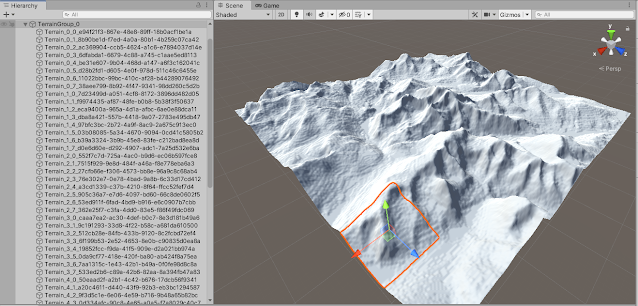
We now have a realistic looking mountain range without having to do any sculpting ourselves!
The problem with this is that a single terrain this size isn't that performant. There are also limitations on the number of textures you can have per terrain. We can improve this by splitting the terrain into multiple connected tiles.
To do this we'll go back to the Terrain Toolbox. Then we'll click on the Terrain Utilities tab, and expand the Terrain Edit section. From here we can choose how many tiles we want to split the terrain into. We'll set this to 8 on the X and Y axis. We'll also deselect the 'Keep Original Terrain' checkbox so that the original is deleted.
We'll click Split to split the terrain into 64 connected tiles.
This will now be much easier to manage and optimise going forward.
That covers everything for this tutorial. We hope that you found it useful. Please leave any questions or feedback in the comments below, and don't forget to subscribe to get notified when we publish our next post.
Thanks.


Loved the structure and flow of this blog. You made a complex topic feel so approachable. Can't wait to see what you publish next!
ReplyDeleteLudo game development company