The Benefits of Prefabs - Unity Game Development Tutorial
In this Unity game development tutorial we'll be looking at how to make the most out of the prefab system.
The prefab system lets you store a GameObject and all of it's configuration as a reusable asset. If you want to have more than one instance of an object in a Scene or you want to use an object in multiple scenes, then you'll want to store that object as a prefab.
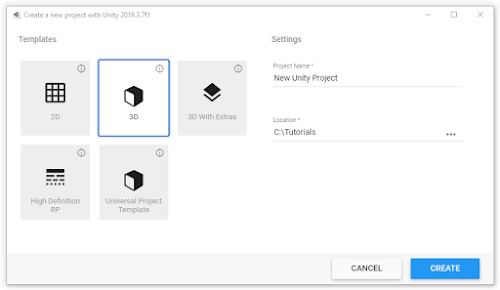
1. To get started let's create a new 3D project in Unity Hub.
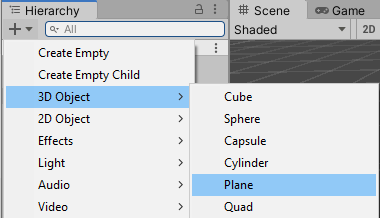
2. Add a Plane to the scene by clicking the plus button on the Hierarchy panel and selecting 3D Object->Plane. We're going to use this plane to represent our floor.
3. Create a new empty game object by clicking the plus button on the Hierarchy panel and selecting Create Empty.
4. Rename the new empty object to 'House' in the Inspector panel.
5. We're going to use this empty object to group lots of other objects together. Start by adding a cube by right clicking on the 'House' in the hierarchy and selecting 3D Object->Cube.
6. Set the transform for the cube in the inspector panel to the values shown below
7. Now we'll create a prefab for our House so that it can be reused over and over again. To do this click and drag the House from the Hierarchy panel to the Project panel. You should now see a thumbnail representing the prefab.
8. If you now drag the prefab thumbnail from the Project panel onto the scene view it will create another instance of the prefab that is identical to the original except for its position.
9. Currently our House doesn't look much like a house. We'll sort that out shortly, but before we do we'll make a few changes to the appearance of the scene. First of all we'll set the lighting to auto generate. Select Window->Rendering->Lighting Settings from the main menu, and then tick the box labelled 'Auto Generate'
10. Next we'll add a material to the floor. To do this click on the plus button in the Project panel and select Material. Name the new material 'Floor'. Set the colour of the material to dark grey by clicking on the box next to Albedo in the Inspector panel and selecting the desired colour.
11. Assign the material by dragging it from the Project panel onto the Plane in the Scene view.
12. Now we can start improving our prefab. To do this click on the House in the Hierarchy and then select 'Open Prefab' in the Inspector panel.
13. From here we can modify our prefab. Let's start by adding a roof to our house. Click on the plus button on the Hierarchy panel and selecting 3D Object->Cube. Set the transform of the new cube to the values shown below.
14. The house will now have a roof. Click on the save button at the top right to save the changes to the prefab.
15. Return to the scene editor by clicking on the arrow next to the prefab name in the Hierarchy
When you return to the scene view you'll see that both instances of the house now have a roof. This is really powerful as it means you only need to make changes in one place to update many instances of an object.
16. It may be that we don't want all instances to appear or behave in exactly the same way. The prefab system supports this by allowing you to override values for individual instance. Let's add a chimney to one of the houses by right clicking on it in the Hierarchy panel and panel and selecting 3D Object->Cube. Set the transform of the new cube to the values shown below.
Now we have one house with a chimney and one without.
17. If we now decided that we wanted all our houses to have chimneys we can apply the individual changes to the prefab. To do this click on the Overrides dropdown in the Inspector panel for the house with the chimney and select 'Apply All'.
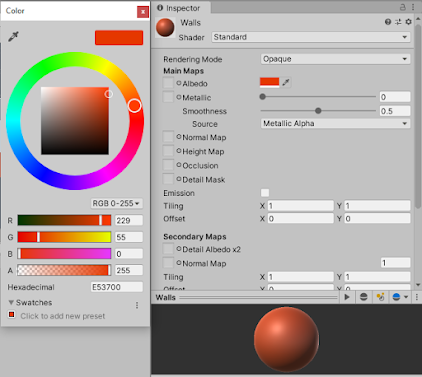
18. Now let's add some colour to our houses. Add a new material in the Project panel and call it 'Walls'. Set the Albedo colour of the material to red.
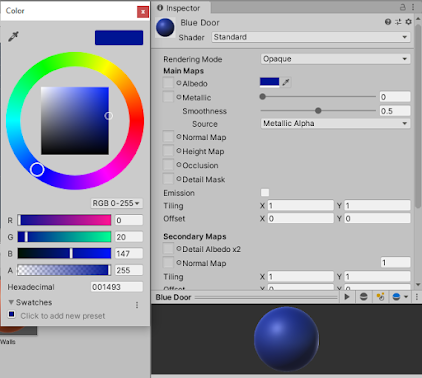
22. Create a new blue material and drag it onto the door to assign it.
23. Save the prefab and return to the scene to see that all the changes have been applied to both houses.
26. Now we have a house with a green door we can save it as a variant of the prefab. To do this drag the house from the Hierarchy to the Project panel. When prompted, select that you wish to create a 'Prefab Variant'
28. Drag the two prefabs onto the Scene view a few times. Rotate and position them however you like and see how easy it is now to create a cluster of houses.


Hey, I love reading this blog for the latest gaming news and updates!
ReplyDeletePublishing a Clicker Game
I recently went through a DiSC assessment, and it was eye-opening! The personalized insights into my strengths and potential areas for growth have been incredibly valuable. Grateful for this powerful tool! Quikdisc Card Game
ReplyDelete