Accelerating a Space Fighter with Forces - Unity Game Development Tutorial
If you'd prefer to watch the video version of this tutorial please click here.
Right, let's get started by creating a new 3D project in Unity Hub.
The first thing we need is an object to apply forces to. For this, we'll head over to the asset store by selecting Window->Asset Store from the main menu.
We'll search for 'SpaceFighter' and download and import this free asset.
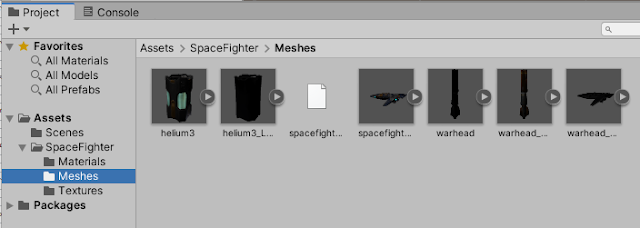
Now we’ll navigate to the Meshes folder in the Project panel.
From here we'll drag the spacefighter_LOD0 into the scene. We'll reset it’s transform by clicking the three dots in the Inspector Panel and then on Reset.
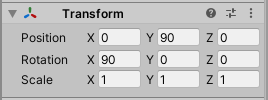
Next, we'll position the camera above the space fighter by selecting it in the Hierarchy, and setting its Transform as follows.
We'll also set the Clear Flags value to 'Solid Color' and set the background to black so it looks a bit more like space.
The final thing we'll do to improve the appearance of the scene is to generate the lighting. To do this we’ll select Window->Rendering->Lighting Settings from the main menu.
Then we'll tick the 'Auto Generate' check box.
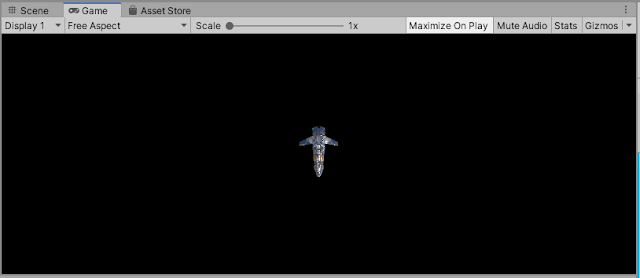
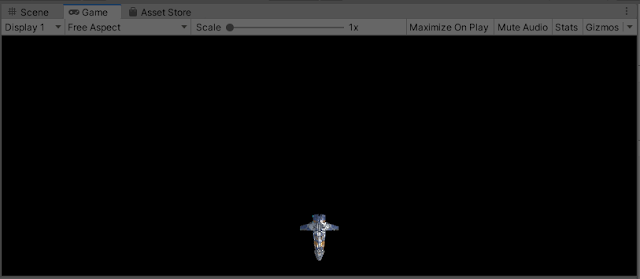
Once the lighting has finished generating the scene should look like this.
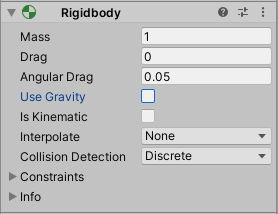
Now we're going to look at how we can apply forces to the space fighter. For us to be able to do this we need to select the space fighter in the hierarchy, click 'Add Component', and search for the Rigidbody component.
The Rigidbody component will put the movement of the space fighter under the control of Unity's physics system.
If we then press play, we'll see that the space fighter now falls due to gravity.
This isn't the behaviour we want, so we’ll stop the game and uncheck the 'Use Gravity' checkbox in the Inspector Panel, which will stop gravity being applied to our fighter.
Next, we'll write a script to apply a force when we press the spacebar. To do this we’ll click on 'Add Component', search for the script component, and add a new script called 'FighterMovement'.
We'll navigate to the Assets folder in the Project panel and double click the script to open it in Visual Studio.
We'll change the script to match the following.
using UnityEngine;

public class FighterMovement : MonoBehaviour
{
    public float forceSize;

    private bool applyForce;
    private Rigidbody rigidBody;

    void Start()
    {
        rigidBody = GetComponent<Rigidbody>();
    }

    void Update()
    {
        if (Input.GetKey(KeyCode.Space))
        {
            applyForce = true;
        }
        else
        {
            applyForce = false;
        }
    }

    void FixedUpdate()
    {
        if (applyForce)
        {
            rigidBody.AddRelativeForce(0, 0, forceSize * -1);
        }
    }
}
We've added a public variable to hold the size of the force we want to apply. Then we’ve added a private boolean that is used to determine whether we need to apply the force or not.
In order to apply a force we need to access to the Rigidbody component, so we've added another private variable to hold this. In the Start method we're then getting the Rigidbody component and assigning it to this variable.
In our Update method, we're checking to see if the spacebar is being pressed. If it is, we're setting our boolean variable to true, otherwise we're setting it to false.
When it comes to applying forces it is recommended to use the FixedUpdate method, which is specifically for physics calculations. Within the Fixed Update method we're checking if we need to apply the force. If we do, we're adding the force to the rigidbody. As we want the space fighter to travel in the direction it is facing, we're use the AddRelativeForce method which applies the force relative to the rotation. The forward direction of the fighter is along the negative Z axis, so we're applying the force on the Z axis and multiplying the size by minus one to make it move in the right direction.
We'll now save the script and switch back to Unity. We'll select the fighter in the hierarchy, and set the force size to twenty in the Inspector panel.
If we press the play button and then hold the spacebar, the fighter will accelerate and fly off the screen.
Next, we'll make things a bit more interesting by letting the player control the direction of the space fighter.
We'll stop the game by pressing the play button again, and we'll switch back to the script and make the following changes.
using UnityEngine;

public class FighterMovement : MonoBehaviour
{
    public float rotationSpeed;
    public float forceSize;

    private bool applyForce;
    private Rigidbody rigidBody;

    void Start()
    {
        rigidBody = GetComponent<Rigidbody>();
    }

    void Update()
    {
        if (Input.GetKey(KeyCode.Space))
        {
            applyForce = true;
        }
        else
        {
            applyForce = false;
        }

        float horizontalInput = Input.GetAxis("Horizontal");
        float rotationAngle = horizontalInput * rotationSpeed * Time.deltaTime;

        transform.Rotate(Vector3.up, rotationAngle);
    }

    void FixedUpdate()
    {
        if (applyForce)
        {
            rigidBody.AddRelativeForce(0, 0, forceSize * -1);
        }
    }
}
We've added a public variable to hold the rotation speed. Then we're getting the player input for the horizontal axis and assigning it to a variable. This will give us a value ranging from -1 to 1 depending on whether the player is pressing the left or right keys. We're combining this variable with our rotation speed to determine the rotation angle, remembering to multiply by Time.deltaTime to ensure the rotation is consistent regardless of our frame rate.
We're then rotating around the Y axis, using the shorthand Vector3.up for the Y axis.
We’ll save the script, switch back to Unity and set the rotation speed to fifty in the Inspector panel.
If we press play now, we'll be able to rotate the space fighter with the left and right arrow keys, and move forwards by pressing the spacebar.
What you might notice is that the fighter is quite hard to keep under control. This is because there is no friction or drag to slow it down, so it just gets faster and faster.
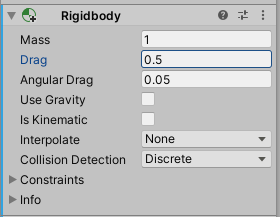
We'll stop the game again and set the drag value of the Rigidbody to 0.5.
If we press play again, the fighter will now slow down when we release the spacebar. This may not be an accurate representation of what would happen in space, but it does make it much easier to control the fighter.
That covers everything for this tutorial. We hope that you found it useful. Please leave any questions or feedback in the comments below, and don't forget to subscribe to get notified when we publish our next post.
Thanks.











Comments
Post a Comment