Changing the Colour of a Material - Unity Game Development Tutorial
You can either watch the video version below or continue reading for written instructions.
Right, let's get started by creating a new 3D project in Unity Hub.
We'll add a cube to the scene by clicking the plus button in the hierarchy and selecting 3D Object->Cube.
Next, we'll create a material. To do this we’ll click on the plus button on the Project panel and select Material. We’ll name this material 'Cube'.
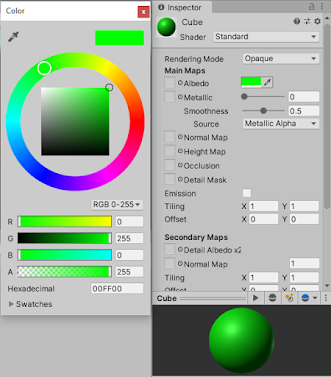
We'll click on this box next to Albedo, and choose a green colour.
We can now drag the material onto the Cube to assign it.
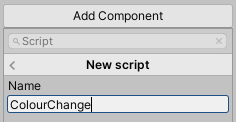
Next, we'll add a script to change the colour when the mouse is over the cube. To do this we’ll select the cube in the hierarchy, click on 'Add Component' and search for the script component. We’ll call this script ColourChange.
We'll double click the script to open it in Visual Studio and change it to match the following.
using UnityEngine;

public class ColourChange : MonoBehaviour
{
    private Renderer renderer;

    void Start()
    {
        renderer = GetComponent<Renderer>();
    }

    private void OnMouseEnter()
    {
        renderer.material.color = Color.red;
    }

    private void OnMouseExit()
    {
        renderer.material.color = Color.green;
    }
}
To get access to the material and change its colour we need to get the Renderer component, so we've created a private field for the Renderer. We're then getting the Renderer component in the Start method.
We want to change the colour when the mouse is over the cube. Fortunately, Unity has a method called OnMouseEnter which is perfect for this. In here, we're accessing the material of the renderer and setting the colour to red.
When the mouse moves off the cube we want to change the colour back to the original value. To do this we make use of the OnMouseExit method. In here, we're accessing the material of the renderer and setting the colour to green.
Let's save the script and switch back to Unity.
Before we start the game, we'll click on the camera and set the 'Clear Flags' value to 'Solid Colour'.
Let's press play to see what happens.
When we move the mouse over the cube it turns red, and when we move the mouse off the cube it changes back to green.
Let's stop the game and duplicate the cube by right clicking on the cube in the hierarchy and selecting Duplicate.
We'll change the position of the new cube as follows.
Let's press play again.
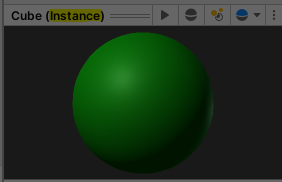
Now when we mouse over the original cube the new one doesn't change colour even though they share the same material. This is because Unity automatically creates a separate instance of the material when we change any of it's values.
This is great as it allows us to change the material of each of our objects independently. But what if we wanted to change them all at the same time?
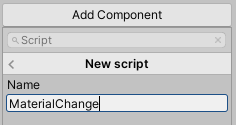
We'll have a look at how to do this now. We'll stop the game and select the camera in the hierarchy. We'll click 'Add Component' in the Inspector and add a new script called MaterialChange.
We'll double click to open it in Visual Studio and update it as follows.
using UnityEngine;

public class MaterialChange : MonoBehaviour
{
    public Material material;

    void Update()
    {
        if (Input.GetKeyDown(KeyCode.Space))
        {
            material.color = Color.red;
        }

        if (Input.GetKeyUp(KeyCode.Space))
        {
            material.color = Color.green;
        }
    }
}
To change the colour of all objects that share a material we need to change the actual material rather than an instance, so we've added a public variable to hold the material we want to update.
Then in the Update method, we're checking if the spacebar has been pressed. If it has we're changing the colour of the material to red.
We're then checking if the spacebar has been released. If it has we're setting the colour back to green.
Let's save the script and switch back to Unity.
We'll select the camera in the hierarchy and then drag the material from the project panel onto the Material field of the script.
Let's press play to try this out.
Now when we press the spacebar both cubes turn red, and when we release both return to green.
If we now mouse over one of the cubes and then move the mouse away we get the original behaviour. If we press the spacebar again you’ll notice that only the cube that we didn’t mouseover changes colour.
This is because the other cube now has its own instance of the material so isn't affected when we change the original.
That covers everything for this tutorial. We hope that you found it useful. Please leave any questions or feedback in the comments below, and don't forget to subscribe to get notified when we publish our next post.
Thanks.


Comments
Post a Comment