Don't Lose Your Work - Unity Game Development Tutorial
In this Unity quick tip we're going to look at some common pitfalls that can cause Unity Developers to lose their work and some tips to help avoid them.
You can either watch the video version below or continue reading for written instructions.
Right, we’re going to demonstrate using the project we created in our 'Collisions' video.
The first thing we're going to look at is something that probably catches out most Unity developers at some point.
We’ll press Play to start our game and then make changes while the game is running. We can change the position of the ball, and move some of the boxes, and then test out our changes.
However, as soon as we stop our game, all the changes are reverted.
While this is useful to try out throwaway changes while playing the game, we can quite easily lose wanted changes accidentally.
One way to help prevent this is to change the UI Play Tint colour to make it more obvious that we're in Play mode.
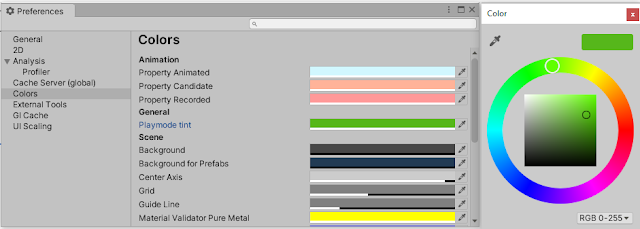
To do this we'll select Edit->Preferences from the main menu.
We'll then select the Colors tab and change the colour of the Playmode tint to a much more noticeable colour, such as bright green.
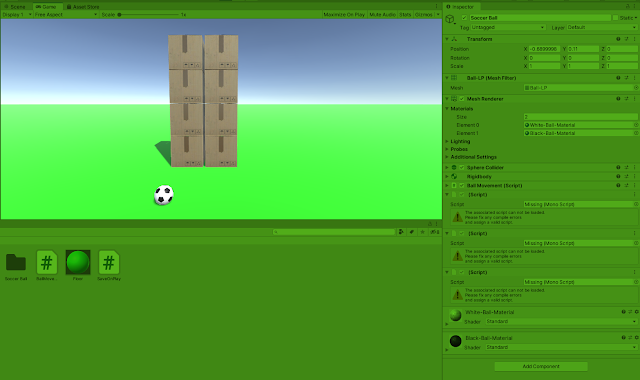
Let's play our game again.
It is now really obvious we're in play mode and are less likely to make changes without realising.
Another thing we can do, if we want to persist changes made in play mode, is to copy the component values.
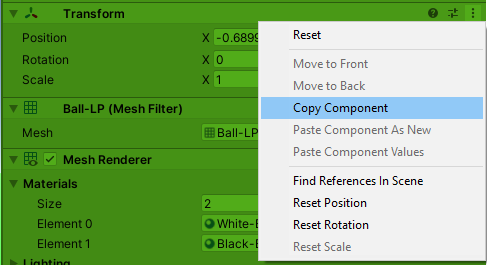
We'll move the ball while in play mode. Then we'll click on the three dots on the Transform component and select 'Copy Component'.
Then we'll stop the game, select the three dots again and select 'Paste Component Values' to apply the changes.
The other trap developers often fall into is thinking they have saved their scene when they haven't. In most software development you usually have to save and build an application before it can be run. For example, if we were creating an application in Visual Studio, clicking the play button would automatically save everything before building and running the application.
This isn't the case in Unity. If we click the Play button, it doesn't save the changes and the unsaved changes asterisk remains. As most developers are used to automatic save on run functionality, they can easily be caught out by this. However, we can solve this issue with a simple script.
We'll click on the plus button on the Project panel and select C# script. We'll call this script SaveOnPlay.
We'll double click the script to open it in Visual Studio and change it to match the following
using UnityEditor;
using UnityEditor.SceneManagement;

[InitializeOnLoad]
public static class SaveOnPlay
{
    static SaveOnPlay()
    {
        EditorApplication.playModeStateChanged += SaveProject;
    }

    private static void SaveProject(PlayModeStateChange playModeStateChange)
    {
        if (playModeStateChange == PlayModeStateChange.ExitingEditMode)
        {
            EditorSceneManager.SaveOpenScenes();
            AssetDatabase.SaveAssets();
        }
    }
}
We've changed this class to be a static class, and we've removed the MonoBehaviour and the Start and Update methods.
We've added a couple of using statements at the top. One for UnityEditor and another for UnityEditor.SceneManagement.
We've then added the InitialiseOnLoad Attribute to the class. This will cause the class to be initialised whenever scripts in the project are recompiled.
Then we've added a static constructor. In here, we're subscribing to the play mode state changed event.
We've then created a method to handle this event. In here, we're checking if we are exiting edit mode, and if we are, we're saving all the open scenes and all our assets.
Let's save the script and switch back to Unity.
Now when we press Play, the scene is saved and the unsaved changes asterisk disappears.
That covers everything for this tip. We hope that you found it useful. Please leave any questions or feedback in the comments below, and don't forget to subscribe to get notified when we publish our next post.
Thanks.


Comments
Post a Comment