LOD Explained - Unity Game Development Tutorial
In this Unity tutorial we're going to look at how we can use LOD, or 'Level of Detail', to help improve the performance of our games.
LOD, or 'Level of Detail', is a technique that reduces the amount of detail rendered the further an object is from the camera. So when we're viewing an object up close, we want to see a high detailed mesh. As we move further away and the object gets smaller, we can switch to a less detailed mesh. This will help prevent the GPU from being overloaded, and the player probably won't notice the drop in detail.
You can either watch the video version below or continue reading for written instructions.
Let's create a new 3D project in Unity Hub to see this in action.

First of all, we'll look at some items from the Asset Store that already have LOD set up, and then we'll look at how to do it ourselves.
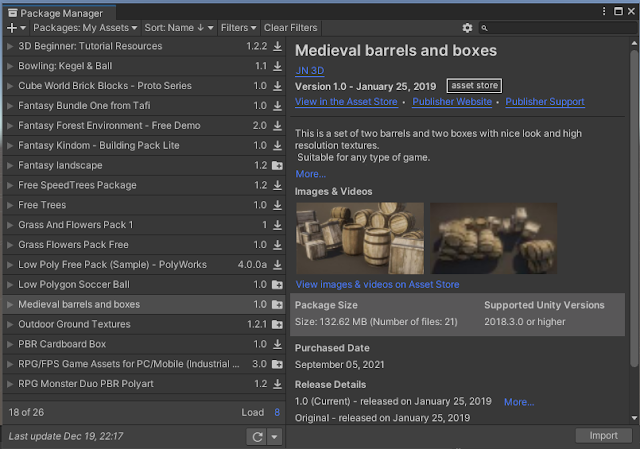
We'll go to assetstore.unity.com. Then we'll search for 'Medieval Boxes' and select this one.

Then we'll add it to our assets and click 'Open in Unity'. We'll find the new package, and download and import everything into the project.
Next, we'll go to the Assets panel, and find the prefabs folder of the package we just installed. Then we'll drag one of the barrels into the scene view.

If we expand the barrel in the Hierarchy, we can see there are several nested meshes for different LOD levels.

We'll double click on the barrel in the Hierarchy to focus the view on it. In the scene view, it shows us the current LOD level of the object.

Currently, it's at Level 0, which is the most detailed. If we zoom out, we'll see the LOD level increase.

Eventually, the object is culled all together.
Let's do the same again without the barrel highlighted.

It's very difficult to notice any difference in the appearance of the barrel as the LOD level increases, which is exactly what we want.
If we select the barrel in the Hierarchy and look in the inspector, we can see an 'LOD Group' Component, which controls the LOD Levels.

We have this bar, that determines when the switch to different levels occurs. We can drag these levels to the left to make it switch to the less detailed models earlier.

Now, as we zoom in and out, we can actually see the detail in the model change.

OK, so now we've covered how it works with an existing asset, let's look at how to set this up from scratch.
Let's delete the barrel from the scene. Then we'll click the plus button on the Hierarchy and create a new Empty object.
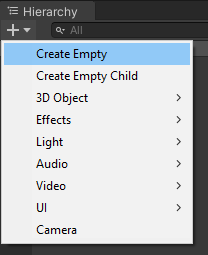
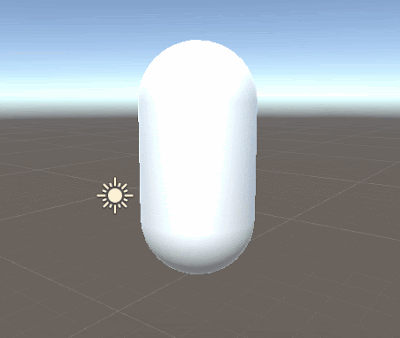
We'll right click on the new object and select '3D Object', Capsule.

Then we'll right click again and add a Cylinder.

Finally, we'll add a Cube.

At the moment, all three are visible in the scene. We're going to configure these at LOD levels, so they only appear at certain distances.
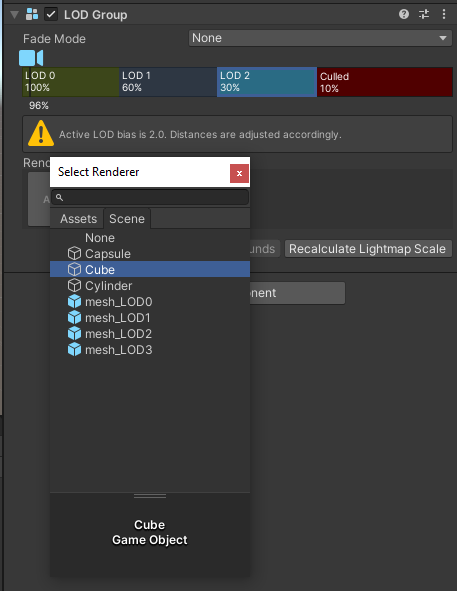
Let's click the top level game object in the Hierarchy. Then we'll click 'Add Component' and add an 'LOD Group'

Now that we have the group, we have to specify what we want to render at each level.
We’ll click 'LOD 0' in the bar. Then we'll click the Add button in the Renderers section and we'll choose the Capsule.

Next, we'll do the same for 'LOD 1'. This time we'll select the Cylinder.

Finally we'll assign the Cube to 'LOD 2'
Now if we zoom in and out, we can see the mesh changing as we move between the LOD levels.
Then when we zoom out far enough, the object is culled completely.

Even if we don't have lots of different LOD meshes for our object, it can still be worth setting up an LOD Group, just so that we can control when it's culled.
If we want to add or remove levels, we can right click on the bar and either select Insert or Delete.
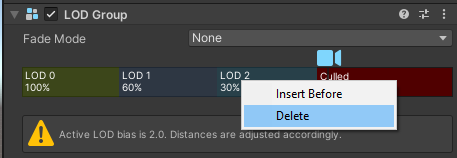
Let's delete everything except the first level.
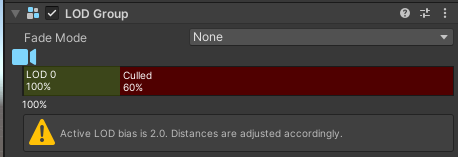
Then we'll delete the Cylinder and Cube from the Hierarchy.
Now when we zoom out, it goes from the capsule to culled.
We can then set the cull point at the desired percentage to get the performance we need, without impacting on the player experience too much.

That covers everything for this tutorial. We hope that you found it useful. Please leave any questions or feedback in the comments below, and don't forget to subscribe to get notified when we publish our next post.
Thanks.


Comments
Post a Comment