Require Component Attribute - Unity Quick Tip
In this Unity quick tip we'll look at how we can use the RequireComponent Attribute to automatically add dependencies to a Game Object.
You can either watch the video version below or continue reading for written instructions.
We'll start with a scene containing a single cube.
We'll add a script to our scene by clicking the plus button on the Project panel and selecting C# Script. We'll call this script Movement.
We'll double click the script to open it in Visual Studio and change it to match the following.
using UnityEngine;

public class Movement : MonoBehaviour
{
    void Start()
    {
        GetComponent<Rigidbody>().AddForce(Vector3.forward * 100, ForceMode.Impulse);
    }
}
In the Start method we're getting the Rigidbody component and applying a force to it in the forward direction.
Now, for this script to work, the Game Object it is assigned to must have a Rigidbody.
To help ensure this is the case we can add the RequireComponent Attribute. This attribute allows us to specify components that this script is dependent on.
We'll make the following changes to the script to do this.
using UnityEngine;

[RequireComponent(typeof(Rigidbody))]
public class Movement : MonoBehaviour
{
    void Start()
    {
        GetComponent<Rigidbody>().AddForce(Vector3.forward * 100, ForceMode.Impulse);
    }
}
We've added the RequireComponent Attribute to the class, and we've specified that the required component is a Rigidbody.
Let's save the script and switch back to Unity.
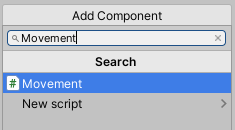
We'll select the cube in the hierarchy and click the 'Add Component' button. We'll then add our Movement script.
You'll notice that by adding the script, Unity has automatically added the required Rigidbody component to the cube for us!
If we press Play now, our script will just work, and the Cube will fly off into the distance.
While this goes a long way to preventing missing dependencies, it should be noted that Unity only checks for missing dependencies when the script is first added to a GameObject.
So for example, let's switch back to the script and add a new RequireComponent Attribute of type Audio Listener.
using UnityEngine;

[RequireComponent(typeof(Rigidbody))]
[RequireComponent(typeof(AudioListener))]
public class Movement : MonoBehaviour
{

    void Start()
    {
        GetComponent<Rigidbody>().AddForce(Vector3.forward * 100, ForceMode.Impulse);
    }
}
If we save this and switch back to Unity, we can see that the Audio Listener has not been added to the cube automatically.
We can get Unity to reassess this by removing the script and adding it back in again.
Now the Audio Listener has been added.
That covers everything for this tip. We hope that you found it useful. Please leave any questions or feedback in the comments below, and don't forget to subscribe to get notified when we publish our next post.
Thanks.


Comments
Post a Comment