How to Make the Camera Follow the Player Using Cinemachine - Unity Game Development Tutorial
In this Unity game development tutorial we're going to look at how we can have the camera follow the player so that they’re always centred in the view.
You can either watch the video version below or continue reading for written instructions.
OK, we'll start with this scene that has a character we can move around.
We created this scene in our post on using the 'Character Controller', so take a look if you want to know how it was done.
At the moment our camera is static, and we are free to move the character completely out of view.
We're going to change this so that our camera tracks the character using a feature of Unity called Cinemachine. Cinemachine provides a suite of tools for creating various different camera behaviours without writing any code.
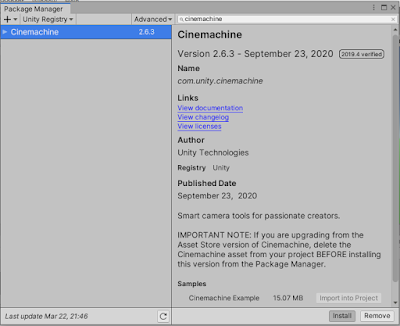
Before we can use this feature, we first need to install the package. We'll select Window->Package Manager from the main menu.
We'll search for Cinemachine and install this package.
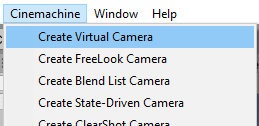
Once this is installed we'll see we now have a Cinemachine option on the main menu. We'll select this and then select 'Create Virtual Camera'
In our hierarchy we now have a new Virtual Camera and our main camera has been updated to have a Cinemachine brain.
The Virtual camera now controls the position and rotation of our main camera. We can add as many of these as we want to set up various different shots. The Cinemachine brain is responsible for monitoring all the virtual cameras and choosing the next Virtual Camera to control the main camera.
In this tutorial, we're just going to setup one virtual camera to track our character.
Let's select the virtual camera in the hierarchy and have a look at the properties in the Inspector.
The Follow property allows us to provide a game object we want the camera to follow, so we'll drag our character into this slot.
We can see that our character is now centred in the Game View.
The 'Look At' property allows us to specify a game object for our camera to aim at. This will automatically rotate the camera to face this GameObject at all times. We just want our camera to follow and not rotate, so we'll leave this blank.
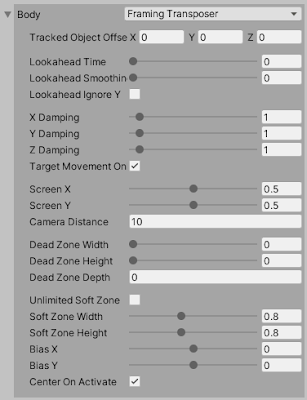
In the Body section, we can choose the algorithm that moves the camera. There are various options to play with, but we're going to select the 'Framing Transposer'.
Let's press play to try this out.
Now the camera tracks our character.
It's a bit too close to the ground though, so let's stop the game and change the angle we're looking at our character.
We'll set the rotation to 45 on the X axis of the Transform.
You can see that Cinemachine has automatically changed the position of our camera, so that we are now looking down on our character at a 45 degree angle.
We'll also zoom in on our character a bit, by setting the Camera Distance to 8.
If we try this out now, it gives us a much better view of our character as it moves around.
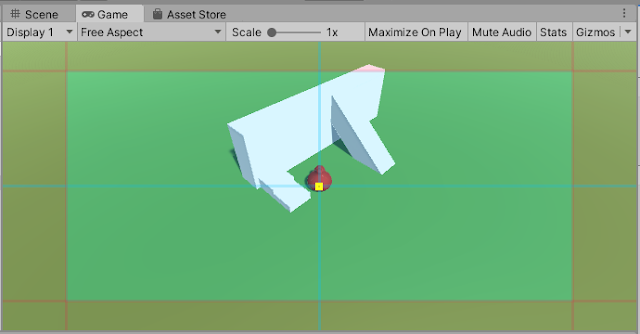
You'll have noticed that we now have an overlay of various coloured boxes on our game view.
The yellow square in the middle shows the target that the camera will follow.
The light blue box highlights what is called the soft zone. When the target is in this region, the camera will realign to the desired position over a period of time. We can see this when we move the character. The crosshairs aren’t quite on the character while it moves, but then it realigns once we stop.
Let's stop the game and make a few more changes.
We'll raise the yellow box slightly to focus on the centre of our character by changing the Y offset to 0.4.
We can change the speed that the camera catches up in the soft zone by altering the damping values. Increasing these values will make the camera catch up slower and decreasing them will make the camera catch up faster. If we want the camera to always keep up, we can set all of these values to zero.
Let's play our game again.
The camera now follows the character exactly and there is no catch up time.
That covers everything for this tutorial. We hope that you found it useful. Please leave any questions or feedback in the comments below, and don't forget to subscribe to get notified when we publish our next post.
Thanks.


Comments
Post a Comment